Good Video about how to build an outdoor bench
How to Build a Modern Outdoor Bench Completely Out of 2x4s with Step-by-Step Guidance
TLDR: This comprehensive guide walks you through how to build an outdoor bench using only 2×4 lumber. It covers cutting, assembly with waterproof glue, sanding, finishing with Danish oil and water sealant, and adding adjustable feet for durability. The design features strong box joint corners and is adaptable to your desired bench size.
Building your own modern outdoor bench can be a rewarding project that combines functionality with style. In this guide, we will walk through the process of building a sleek, durable bench from 2×4 lumber. This design was originally created by the DIY blog DIY Candy, and here we provide a detailed video-based tutorial to complement their written instructions.
## Materials and Tools Needed
– 2×4 lumber
– Tight Bond 3 waterproof wood glue
– Finished nails
– Table saw
– Belt sander
– Circular saw
– Handsaw
– Adjustable metal feet
– Dark walnut Danish oil
– Thompson’s Water Seal (clear version)
– Clamps
– Respirator (for sanding safety)
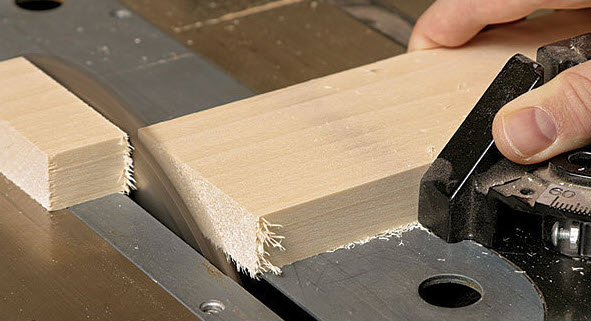
## Step 1: Cutting the 2x4s
Start by cutting all your 2×4 pieces to the lengths required for your bench size. The dimensions depend on how large you want your bench to be. Setting up a stop block on your saw will help keep all cuts consistent and square.
Since 2x4s have rounded edges, run each piece through a table saw to square them. This ensures that when you glue the pieces together, everything fits tightly and squarely.
## Step 2: Assembling the Bench
Use Tight Bond 3 wood glue, which is waterproof and ideal for outdoor furniture. Assemble the bench one slot at a time, starting with one leg. Make sure each leg is square before moving on to the next.
This method helps ensure all legs line up perfectly. The bench uses a box joint configuration, which is very strong and durable. You can hold pieces together with finished nails while assembling.
Repeat the process for the other side of the bench. Assembly goes quickly once you get the hang of it.
### Tip:
Use a large bottle of glue, as this project requires a lot to ensure waterproof strength.
## Step 3: Clamping and Filling Gaps
Once all pieces are assembled, clamp the bench tightly to minimize gaps. Some gaps may remain; you can fill them by mixing wood glue with sawdust to create a filler that blends seamlessly.
## Step 4: Sanding
Use a belt sander to rough sand the entire bench. A palm sander is not sufficient due to the amount of sanding required. Always wear a respirator when sanding to protect your lungs from dust.
## Step 5: Flattening the Bottom of the Legs
To ensure the bench sits evenly, flatten the bottom of each leg. Use a straight edge and circular saw to make cuts partway through, then finish with a handsaw and belt sander.
## Step 6: Installing Adjustable Feet
Attach adjustable metal feet to the bottom of each leg. These allow you to level the bench on uneven ground and prevent the wood from sitting directly on wet surfaces, which can cause damage.
## Step 7: Finishing
Finish sand the bench up to 220 grit for a smooth surface. Apply a coat of dark walnut Danish oil to enhance the wood’s appearance.
For waterproofing, use Thompson’s Water Seal in the clear version. This product soaks into the wood, preventing water penetration without altering the color. It is designed for decks, providing strong protection against the elements.
## Final Thoughts
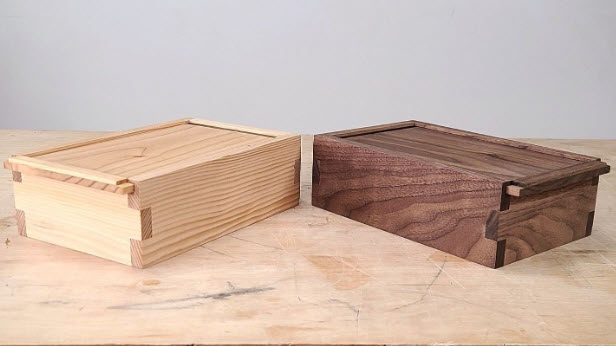
These benches are incredibly sturdy and visually appealing. The box joint corners add a unique and interesting design element.
I will provide all the dimensions and the math needed to customize the bench size in my written article, so you can tailor the bench to fit your space perfectly.
## Additional Resources and Community
If you enjoyed this project and want to see more, consider subscribing to my channel for weekly project videos. Feel free to leave questions in the comments, and I will do my best to respond.
I also have a page on my website where viewers can submit photos of projects inspired by my videos. It’s a great way to share your work with the community.
For updates throughout the week, follow me on Instagram, where I post most often and engage with followers.
Thank you for reading, and happy building!
—
*This guide is based on the Modern Builds episode 30 tutorial by Mike Montgomery.*