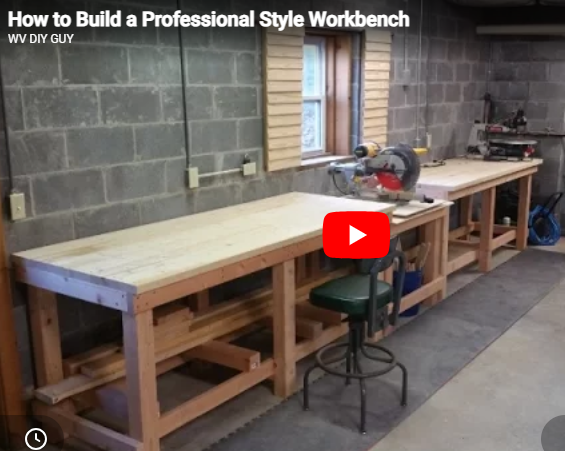
How to Build a Professional Workbench for Your Wood Shop
This comprehensive guide walks you through how to build a professional workbench measuring 7 ft by 33 in and 37 in tall, matching the height of a table saw outfeed. It covers cutting legs, framing the top and bottom, attaching braces, and securing the top boards with pilot holes and screws for a stable, functional workspace.
Building a sturdy and professional workbench is essential for any woodworking enthusiast. In this guide, Zach, the West Virginia DIY guy, shares his step-by-step process for how to build a professional workbench tailored to his wood shop needs. The workbench measures 7 feet long, 33 inches deep, and stands 37 inches tall, matching the height of his table saw outfeed for seamless workflow.
## Planning and Dimensions
– **Length:** 7 feet
– **Depth:** 33 inches
– **Height:** 37 inches (same as table saw outfeed)
The height alignment allows for easy movement of larger wood pieces from the table saw to the workbench.
## Building the Legs
– Six legs are required.
– Each leg is made from a 4×4 post measuring 35 1/2 inches long.
Zach begins by measuring and cutting all six legs to the specified length.
## Framing the Top
– The frame is constructed using 2×4 lumber.
– Two pieces are cut at 7 feet long.
– Six pieces are cut at 28 inches long.
### Assembly
– Pilot holes are drilled to prevent wood splitting.
– The two 7-foot end pieces are attached to the legs.
– A 7-foot runner board is attached across the front at the top, centered on the legs for stability.
– The bracing for the top is placed on the outside edges to provide more stability.
## Framing the Bottom
– Bracing is placed on the inside to allow more legroom when sitting at the bench.
– Bottom boards are cut to 81 inches (shorter than the top frame) to fit inside the legs.
– Two 81-inch pieces are installed as footrests, positioned 5 inches up from the bottom, providing comfortable support.
## Additional Bottom Support
– Two more 28-inch pieces are cut and installed evenly spaced across the bottom.
– A 21-inch center support piece is added between the bottom legs to spread and support the base.
– Plans include adding more boards later to create a shelf.
## Recap of Measurements
– Legs: 35 1/2 inches
– Top frame front and back: 7 feet 8 1/4 inches
– Bottom frame: 81 inches (inside placement)
– Top braces: six 28-inch pieces evenly spaced
– Bottom braces: 31 inches on the outside
– Total height with 2×6 top boards: 37 inches
## Preparing the Workbench Top
– All top boards are cut to 7 feet long for flush ends.
– The back is made flush with the frame, leaving about 2 inches overhang at the front for clamping and working.
### Clamping and Aligning
– Boards are U-clamped to the frame to remove warps and bows.
– A long clamp is used as a guide to keep screw holes aligned without marking the surface.
## Attaching the Top
– Pilot holes are drilled through the top boards into the frame.
– 2 1/2 inch screws are used to secure the top (shorter than the 3 1/2 inch screws used elsewhere).
## Final Steps
– Zach ran short of screws before finishing the top but ensured the boards were tight enough to remove clamps.
– The workbench is now sturdy and ready for use.
## Conclusion
Building a professional style workbench requires careful measurement, precise cutting, and thoughtful assembly. By following Zach’s method, you can create a durable and functional workspace tailored to your woodworking needs. The alignment with the table saw outfeed and the thoughtful placement of braces and footrests make this workbench both practical and comfortable.
Enjoy your woodworking projects with your new custom-built workbench!