How to Build a Low-Budget Woodworking Workbench
TLDR: This article provides a detailed guide on building a cost-effective woodworking workbench using mortise and tenon joinery. It covers tool alternatives, step-by-step instructions for cutting mortises and tenons, assembling the base with draw boring for strength, creating the workbench top, and adding functional features like bench dogs and a vice.
Building a sturdy and functional low budget woodworking bench doesn’t have to break the bank. This guide walks you through building a low-budget Woodworkers-style workbench, focusing on traditional mortise-and-tenon joinery for strength and durability. Free plans are available if you want to follow along and build your own.
## Tools and Materials
While some expensive woodworking tools like a table saw and drill press are used in this build, they are not strictly necessary. Alternatives such as a hand drill or plunge router can be employed for many of the procedures.
The timber has been milled and prepared, ready to be cut to the correct lengths.
## Step 1: Cutting the Mortises
The workbench uses mortise-and-tenon joinery. The first step is to cut the mortises.
– A plunge router is used to cut the mortises.
– A simple jig made from plywood guides the router. This jig has a hole cut in the shape of a tenon and two fences for referencing against the workpiece.
– The hole in the jig is oversized to allow referencing off a bushing set on the router.
For the feet, the mortises are set further in from the end. The jig is adjusted by removing one fence and aligning the centerline of the jig with the centerline of the tenon.
## Step 2: Cutting the Tenons
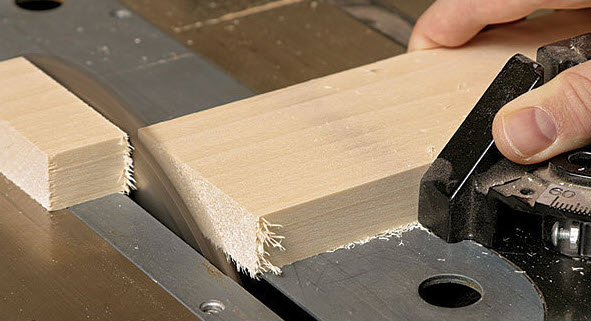
Next, cut the tenons to fit the mortises.
– A simple jig holds the stock at the table saw for making cheek cuts.
– If a table saw is not available, a plunge router with a suitable jig can be used to cut the cheeks of the tenons.
– Chisels are used to remove the corners of the tenons to fit into the rounded mortises.
Before gluing the leg assemblies, a small decorative curve is added to the bottom of the legs.
## Step 3: Assembling the Leg Assemblies with Draw Boring
To ensure strong joints, a technique called draw boring is used:
– Dowels are driven through the mortise and tenon joints to provide mechanical strength.
– Holes are drilled through the mortises beforehand.
– With the assembly clamped square, the same drill bit is used to mark holes on the tenon slightly offset from the mortise holes.
– Drilling the tenon holes slightly above the mortise holes allows the dowel to pull the joint tight when driven through.
– Each joint is marked to ensure correct reassembly.
After the glue dries, excess dowels are cut away and sanded smooth.
## Step 4: Preparing the Stretchers
The stretchers join the two leg assemblies:
– Tenons are cut on the ends of the stretchers, slightly tighter than those on the legs.
– These joints are designed to be assembled without glue.
– The positions of the tenons are marked on the legs.
– Holes are drilled through each mortise to allow for fixing bolts.
## Step 5: Assembling the Base
The base of the workbench is assembled using bolts through the mortise and tenon joints:
– Bolting the base allows for disassembly if needed.
## Step 6: Constructing the Workbench Top
The top is made from materials on hand:
– MDF, plywood, and a top layer of melamine-faced chipboard are used.
– A flush trim bit on the router cuts the MDF and plywood to the exact size of the chipboard.
– A clearance cut is routed on the underside to fit a vice.
## Step 7: Adding Functional Features
– Small cutouts are made for nuts.
– Holes for bench dogs are drilled using a 19mm Forstner bit, started with a plunge router and finished by hand.
### Homemade Bench Dogs
Commercial bench dogs can be expensive, so homemade versions are made:
– Designed for a tight fit into the holes.
– Adjustable to any height.
– Feature a flat surface to butt pieces of wood against.
## Conclusion
This low-budget woodworking workbench combines traditional joinery techniques with practical design features, making it a great project for woodworkers of all levels. The use of draw boring enhances joint strength, and the bolted base allows for easy disassembly. The workbench top is versatile and functional, complete with a vice and bench dogs.
Whether you have access to advanced tools or prefer hand tools, this project is adaptable and rewarding.
Happy woodworking!