How to Cut Wood Straight (Beginner Techniques That Work)
One of the first challenges every beginner faces in woodworking is how to cut wood straight. Crooked cuts can ruin projects, waste wood, and cause pieces not to fit together properly. Many beginners assume they just need better tools, but the real solution is learning proper technique.
The truth is, straight cuts come from skill, not expensive equipment. With the right methods, even basic tools can produce clean, accurate results. In this guide, you’ll learn how to cut wood straight using simple techniques, what mistakes to avoid, and how to improve quickly.
Quick Answer
To cut wood straight, mark a clear line, secure the wood, use a steady motion, and let the blade do the work. Straight cuts come from proper setup and technique more than tool price.
Why Straight Cuts Matter
Straight cuts affect nearly every part of a project:
Pieces fit correctly
Joints align properly
Projects look professional
Materials aren’t wasted
Assembly is easier
Crooked cuts cause more problems than almost any other beginner mistake.
A board that is cut slightly crooked may not seem like a big problem at first, but small errors can multiply as the project comes together. One uneven cut can throw off a corner, create gaps, or make shelves and frames sit out of square. Learning how to cut wood straight on early saves time, money, and frustration later.
Step-by-Step: How to Cut Straight
Follow this simple process for accurate results.
Step 1 — Mark the Cut Line Clearly
Use a square and pencil to draw a visible line. A clear line acts as your guide while cutting.
For darker woods, use a white pencil, marking knife, or painter’s tape to make the line easier to see. If the line is hard to follow, your cut will be harder to control. Always mark the waste side of the board so you know which side of the line to cut on.
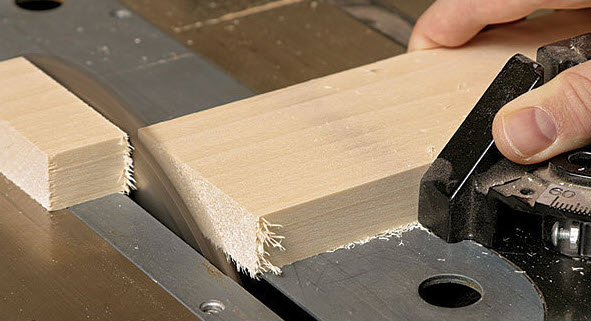
Step 2 — Secure the Wood
Movement causes crooked cuts.
Use:
Clamps
Workbench
Non-slip mat
Stable wood = straight cut.
Never try to hold the board with one hand while cutting with the other if the wood is moving around. Even a small shift can pull the blade off the line. Clamping the wood also helps you focus on guiding the tool instead of fighting the board.
Step 3 — Start Slowly
Begin the cut gently to guide the blade into position. Rushing the first stroke often causes drift.
The first few seconds of the cut are important. Once the blade starts off crooked, it becomes harder to correct. Take your time and let the blade create a small path before applying steady pressure.
Step 4 — Follow the Line, Don’t Force the Tool
Let the blade cut naturally. Forcing it can bend the blade and create uneven lines.
If the saw feels like it is struggling, stop and check the blade, the wood position, or your angle. Pushing harder usually makes the cut worse. A smooth, steady pace is better than speed.
Woodworking Tools for Beginners
Woodworking Tools for Beginners (Complete Starter List) One of the biggest questions beginners ask is: What tools do I actually need to...
Step 5 — Finish Smoothly
Slow down near the end of the cut to avoid splintering or tearing.
The end of a cut is where many beginners lose control because the waste piece starts to fall away. Support both sides of the board when possible so the wood does not break before the cut is complete.
How to Cut Straight With Different Tools
Hand Saw
Tips:
Use long strokes
Watch the line, not the blade
Keep wrist straight
Best for learning control.
When using a hand saw, let the full length of the saw do the work. Short, choppy strokes can create uneven cuts and make the saw bind. Keep your shoulder, elbow, and wrist moving in a natural straight line. Stand so your body is aligned with the cut, rather than reaching from the side.
Circular Saw
Tips:
Use a guide or straightedge
Keep base flat
Start before touching wood
Great for long straight cuts.
A circular saw becomes much easier to control when paired with a straightedge guide. Clamp a straight board, level, or saw guide to the wood and run the saw base against it. This helps prevent drifting and gives you a cleaner result, especially on plywood or long boards.
Jigsaw
Tips:
Use a slow speed
Use a sharp blade
Support wood fully
Jigsaws require more control for straight cuts.
A jigsaw is useful, but it is not always the best tool for perfectly straight lines. The thin blade can flex, especially in thick wood. To improve accuracy, choose a blade designed for straight cuts and avoid turning the saw while cutting. Let the blade stay vertical and move slowly.
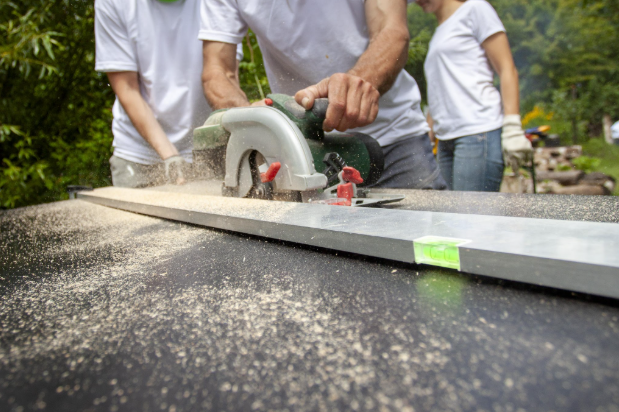
Using Guides for Straighter Cuts
One of the easiest ways beginners can improve is by using a guide. A guide gives the saw something straight to follow instead of relying only on your hand control.
Common cutting guides include:
Straight board
Metal ruler
Clamp-on straightedge
Speed square
Track guide
For circular-saw shortcuts, a speed square works very well. For long cuts, clamp a straight board across the workpiece. Always measure the distance from the saw blade to the edge of the saw base so your guide is placed correctly.
Measure Twice Before Cutting
Straight cuts are not only about controlling the saw. They also depend on accurate measuring. If your measurement is wrong, the cut can be straight but still useless.
Before cutting, check:
Board length
Mark location
Cut side
Blade thickness
Project measurement
Remember that saw blades remove material as they cut. This is called the kerf. If you cut directly on the wrong side of your line, your piece may end up too short. Beginners should get in the habit of cutting just outside the line and sanding down to the final size when accuracy matters.
Beginner Mistakes That Cause Crooked Cuts
Avoid these common errors:
Cutting too fast
Not clamping wood
Using dull blades
Watching blade instead of line
Applying too much pressure
Most crooked cuts come from rushing.
Another common mistake is standing in an awkward position. If your body is twisted or your arms are stretched too far, it becomes harder to guide the tool straight. Before cutting, position yourself so you can move comfortably from the start of the cut to the finish.
How Blade Choice Affects Straight Cuts
The blade you use makes a big difference. A dull, damaged, or incorrect blade can wander, burn the wood, or leave rough edges.
For cleaner straight cuts:
Use a sharp blade
Match the blade to the material
Use fine-tooth blades for smoother cuts
Use rip blades for cutting with the grain
Use crosscut blades for cutting across the grain
A cheap tool with a good blade often performs better than an expensive tool with a dull blade. If your saw is suddenly harder to control, the blade may need to be replaced.
Practice Drill for Straight Cutting
Try this simple exercise:
Draw straight lines on scrap wood
Cut along lines slowly
Compare cut to line
Repeat
Practice builds control quickly.
To make the drill more useful, draw lines at different lengths. Start with short lines, then move to longer cuts. Try using different tools if you have them. This helps you learn how each saw feels and how much control each one requires.
Signs Your Cutting Skill Is Improving
You’re getting better when:
Cuts follow the line closely
Edges look smooth
Less sanding is needed
Pieces fit together cleanly
Confidence increases
Progress usually appears after repeated practice.
Another good sign is that you begin to notice small problems before they become big mistakes. For example, you may feel the saw drifting and correct your body position sooner. This kind of awareness is what turns a beginner into a more confident woodworker.
Pro Tips for Perfect Cuts
Experienced woodworkers use these tricks:
Use sharp blades only
Cut slightly outside the line
Sand to final line
Support both sides of wood
Keep tools clean
Precision comes from preparation as much as technique.
You can also use painter’s tape over the cut line to reduce tear-out on plywood and finished boards. Mark your line on top of the tape, cut carefully, then remove the tape after cutting. This simple trick can help produce cleaner edges.
Straight Cut Difficulty by Tool
Tool
Difficulty
Accuracy Potential
Handsaw
Medium
High
Circular saw
Easy
Very high
Jigsaw
Harder
Medium
Circular saws are often easiest for beginners to cut straight.
Best Wood for Practicing Straight Cuts
Beginners should practice on affordable scrap wood before cutting expensive project boards. Pine, plywood scraps, and leftover 1x boards are good options. Avoid starting on hardwood or thin delicate trim until you are more comfortable.
Good practice wood:
Pine boards
Plywood scraps
MDF scraps
Old project leftovers
Construction lumber
Practicing on scrap wood removes pressure. You can focus on control instead of worrying about ruining your material.
How to Fix a Slightly Crooked Cut
Not every crooked cut means the board is ruined. Small errors can often be fixed.
Try these fixes:
Sand the edge flat
Use a block plane
Trim the edge again
Hide the edge inside the project
Use wood filler for tiny gaps
If the cut is badly crooked, it may be better to re-cut the board or use that piece for a smaller part. Beginners should not feel discouraged by mistakes. Every woodworker has made crooked cuts while learning.
FAQ
Why are my cuts always crooked?
Usually because of rushing, poor marking, or failure to secure the wood.
Is cutting straight hard to learn?
No. Most beginners improve quickly with practice.
Do expensive saws cut straighter?
Not necessarily. Technique matters more than price.
Should I sand crooked cuts?
Yes, small errors can be corrected with sanding.
What is the easiest saw for straight cuts?
For many beginners, a circular saw with a guide is one of the easiest ways to make straight cuts.
Should I cut on the line or beside it?
Cut slightly outside the line, especially when accuracy matters. You can sand or trim down to the final measurement.
Final Verdict
Cutting wood straight is a foundational woodworking skill that improves with practice, not expensive tools. Clear markings, steady motion, and patience are the keys to accurate cuts.
If you focus on setup and technique, you can achieve clean, straight cuts even with basic tools. Master this skill early, and every project you build will look better and fit together more easily.
Straight cutting is not about being perfect on your first try. It is about building repeatable habits. Mark carefully, clamp securely, start slowly, and guide the tool with control. Over time, straight cuts will feel natural, and your woodworking projects will become cleaner, stronger, and more professional-looking.