Apartment Woodworking Setup (Complete Beginner Guide)
Many people believe woodworking isn’t possible in an apartment because of noise, dust, or lack of space. But thousands of beginners successfully build projects indoors every day using smart apartment woodworking setup strategies and the right tools.
The truth is, you don’t need a garage or workshop to start woodworking. With the right apartment woodworking setup, you can create a clean, quiet, and efficient workspace inside your living space. In this comprehensive guide, you’ll learn exactly how to design an effective apartment woodworking setup, what tools work best for indoor spaces, and how to avoid common problems that stop beginners before they start.
Quick Answer
You can create a successful apartment woodworking setup by using compact tools, a portable work surface, quiet hand tools, strategic storage, and good organization. Even a small corner can function as a complete beginner workshop when your apartment woodworking setup is designed properly.
Why Apartment Woodworking Setup Is Possible
An apartment woodworking setup works because beginner and intermediate projects don’t require large machines or heavy equipment. The key is understanding that most woodworking fundamentals can be learned and practiced with hand tools and carefully selected compact power tools.
Advantages of an indoor apartment woodworking setup:
- Climate-controlled workspace — No extreme temperatures, humidity fluctuations, or weather interruptions that affect wood and finishes
- Easy access anytime — Work whenever inspiration strikes, day or night, without traveling to a separate location
- Lower setup cost — No need to rent or build a separate workshop space, saving hundreds or thousands of dollars
- Cleaner environment — Indoor spaces motivate better dust control and organization habits
- Better focus — Fewer distractions than shared garage spaces or outdoor areas
- Security — Tools and projects stay safe inside your locked living space
- Immediate availability — No commute or setup time means you can work in short sessions
- Year-round operation — Weather never prevents you from working on projects
Many experienced woodworkers actually prefer indoor apartment woodworking setup configurations for small builds. The controlled environment and immediate accessibility often lead to more consistent practice and faster skill development than sporadic garage workshop sessions.
The psychological benefit is significant too. When your apartment woodworking setup is well-organized and inviting, you’re more likely to work regularly. A dedicated space—even a small one—signals commitment and makes woodworking feel like a legitimate hobby rather than an occasional activity.
Minimum Space Requirements for Apartment Woodworking Setup
You only need a surprisingly small footprint to create an effective apartment woodworking setup.
Ideal minimum workspace: 3–4 feet square (9-16 square feet)
This minimal footprint can be found in:
- Corner of a living room — Often underutilized space that’s perfect for a compact apartment woodworking setup
- Bedroom corner — Especially in spare bedrooms or master bedrooms with extra space
- Dining area section — If you have a separate dining room or large dining area
- Balcony or patio — Covered outdoor spaces work excellently for hand tool-focused apartment woodworking setup
- Wide hallway — Hallways wider than 4 feet can accommodate fold-down benches
- Closet workshop — Remove closet doors and install a work surface for a hidden apartment woodworking setup
- Home office section — Share space with your desk by using portable equipment
- Laundry room corner — Often overlooked but can work well with proper organization
If you can place a small table and stand comfortably with room to move your arms freely, you have enough space for a functional apartment woodworking setup. This area accommodates a small workbench, basic tool storage, and room to work on projects up to 2-3 feet in length—which covers the majority of beginner and intermediate woodworking projects.
Space planning considerations for your apartment woodworking setup:
- Measure carefully — Document your available area before buying furniture or tools
- Ceiling height — Minimum 7 feet for comfortable standing work
- Electrical access — At least one dedicated outlet within 6 feet of your work area
- Ventilation — Proximity to windows or doors for air circulation during finishing work
- Flooring protection — Ensure flooring can handle occasional spills, dropped tools, or can be protected with mats
- Natural light — Windows improve visibility and make the space more pleasant to work in
- Noise transmission — Consider which walls are shared with neighbors when planning your apartment woodworking setup location
Best Work Surfaces for Apartment Woodworking Setup
Your work surface forms the foundation of any apartment woodworking setup. It should be compact, portable, and stable enough for real woodworking tasks.
Best work surface options for apartment woodworking setup:
Folding Tables
Portable and storable, typically 2×4 feet or 3×6 feet. Look for models rated for at least 200-300 pounds. Quality folding tables can be set up when needed and stored flat against a wall or in a closet between sessions. This flexibility makes them ideal for apartment woodworking setup in shared spaces.
Pros: Inexpensive ($40-100), highly portable, easy storage Cons: May lack stability for heavy work, no built-in clamping options
Portable Workbenches
Commercial options like the Black & Decker Workmate or similar models combine work surface with built-in clamping mechanisms. These specialized benches fold completely flat and weigh 20-40 pounds for easy storage and transport.
Pros: Built-in vises, designed for woodworking, relatively stable Cons: More expensive ($80-150), smaller work surface than folding tables
Reinforced Desks
Repurpose a sturdy desk by adding a sacrificial plywood or MDF top. This provides a permanent workspace if you have a dedicated area in your apartment woodworking setup. Choose desks with solid construction—avoid particle board or hollow-core options.
Pros: Permanent setup, often includes storage, comfortable height Cons: Takes up constant floor space, less portable
Fold-Down Wall Benches
Mount to wall studs and fold up when not in use. Ideal for extremely tight apartment woodworking setup configurations. Can be DIY-built for $50-100 using heavy-duty hinges and support brackets, or purchased commercially for $150-300.
Pros: Zero floor space when stored, very stable when properly installed Cons: Requires wall mounting (may violate lease), installation complexity
Critical features for apartment woodworking setup work surfaces:
- Stability — No wobbling during sawing, planing, or hammering operations
- Flat surface — Level work area ensures accurate assembly and measurement
- Storage capability — Folds, collapses, or moves out of the way when not in use
- Durability — Withstands clamping pressure, tool impact, and occasional moisture
- Appropriate height — Typically 34-36 inches for comfortable standing work
- Clamping options — Overhang or holes for securing workpieces
Portability is especially valuable in apartment woodworking setup configurations where the work surface needs to serve multiple purposes or be cleared for other activities like dining or entertaining.
Essential Tools for Apartment Woodworking Setup
Quiet and compact tools work best in any apartment woodworking setup. Prioritize hand tools and select power tools carefully based on noise levels and dust generation.
Recommended tools for apartment woodworking setup:
Hand Saws
Japanese pull saws or Western handsaws cut quietly and accurately. Essential for any apartment woodworking setup. No electricity required, minimal noise generation, and compact storage. A quality handsaw costs $20-50 and will last for years.
Cordless Drill/Driver
The most versatile power tool for apartment woodworking setup. Handles drilling pilot holes, driving screws, and light sanding with attachments. Choose 12V models for light work or 18V for more demanding tasks. Modern brushless motors run quieter than older designs.
Clamps
Essential for assembly, gluing, and securing workpieces. Start with 4-6 bar clamps (12-24 inches) and several spring clamps. Clamps are often called “extra hands” and dramatically improve project quality. Store on wall hooks to save precious floor space in your apartment woodworking setup.
Measuring and Marking Tools
Combination square, 25-foot tape measure, marking gauge, and pencils form the accuracy foundation of your apartment woodworking setup. These tools are more important than any cutting tool—accurate measurements prevent wasted materials and frustration.
Sandpaper and Sanding Block
Hand sanding is quiet, effective, and perfect for apartment woodworking setup. Stock grits from 60 (rough shaping) through 220 (final finishing). A simple sanding block costs $5-10 and dramatically improves sanding efficiency.
Chisels
Basic 4-piece set (1/4″, 1/2″, 3/4″, 1″) for detail work, joinery, and cleanup. Takes minimal storage space and operates completely silently. Even budget chisels work well when properly sharpened.
Block Plane
Smooths edges and surfaces quietly and effectively. Compact design fits easily in any apartment woodworking setup. A quality block plane costs $30-70 and handles countless tasks.
Safety Equipment
Safety glasses, dust masks, and hearing protection (for occasional power tool use). Never compromise on safety equipment—your health is worth far more than the minimal cost.
These tools allow you to complete most beginner and intermediate projects without noise complaints. They form the foundation of a capable apartment woodworking setup that can grow with your skills.
Tools to Avoid in Apartment Woodworking Setup
Certain tools create excessive noise or dust that’s difficult to control in indoor spaces. Avoid these in your apartment woodworking setup:
Not suitable for apartment woodworking setup:
- Table saws — Extremely loud (90-100 decibels) and produce massive amounts of fine dust
- Thickness planers — Create deafening noise and generate chips that spread throughout living spaces
- Large routers — High-pitched whine (85-95 decibels) carries through walls and floors
- Belt sanders — Loud operation and create fine dust clouds that are hard to contain
- Air compressors — Cycling noise disturbs neighbors and takes up valuable floor space
- Miter saws — Loud cutting action and require significant setup space
- Circular saws — While useful, they’re loud and should be used sparingly in apartment woodworking setup
If you need these capabilities, consider alternatives:
- Use hand tool equivalents (hand planes instead of power planers)
- Purchase pre-cut or pre-milled lumber from suppliers
- Access community workshops or makerspaces for occasional large tool operations
- Work with neighbors to schedule brief power tool sessions during acceptable hours
Noise Reduction Strategies for Apartment Woodworking Setup
Noise management is critical for sustainable apartment woodworking setup. These strategies keep neighbors happy and make woodworking viable long-term.
Effective noise reduction techniques:
Prioritize Hand Tools
This is the single most effective strategy for apartment woodworking setup. Hand saws, planes, and chisels operate at 40-50 decibels (normal conversation level) compared to power tools at 85-100 decibels.
Respect Quiet Hours
Work during reasonable hours—typically 9 AM to 6 PM on weekdays, 10 AM to 5 PM on weekends. Check your lease agreement for specific quiet hours and respect them absolutely. Most noise complaints happen because of timing, not volume.
Use Vibration Dampening
Place rubber mats, anti-vibration pads, or foam under tools and your work surface. This reduces noise transmission through floors—particularly important for upstairs apartment woodworking setup configurations.
Close Barriers
Close windows, doors, and curtains during work sessions. Simple barriers significantly reduce sound escape to hallways and adjacent units. Consider weatherstripping doors for additional sound dampening.
Work Deliberately
Rushed, aggressive cutting creates more noise. Controlled, deliberate cuts are quieter, more accurate, and safer. This mindset shift improves both your apartment woodworking setup experience and your results.
Choose Quiet Tools
When buying power tools for your apartment woodworking setup, choose brushless motor models that run 5-10 decibels quieter than traditional motors. Read reviews specifically mentioning noise levels.
Communicate Proactively
Let neighbors know your schedule and ask about concerns before problems arise. Most people are accommodating when you’re considerate and proactive. Consider offering to adjust your schedule if conflicts arise.
Use Hearing Protection
Even if your apartment woodworking setup is relatively quiet, protect your hearing during any power tool use. This also signals to neighbors that you’re taking noise seriously.
Dust Control in Apartment Woodworking Setup
Dust management keeps your living space clean, safe, and healthy. Effective dust control is non-negotiable in any apartment woodworking setup.
Comprehensive dust solutions:
Work Over Drop Cloths
Plastic or canvas drop cloths contain sawdust and make cleanup faster. Fold and shake outside after work sessions. This simple step prevents sawdust from spreading throughout your apartment.
Vacuum Immediately
Use a shop vacuum with HEPA filter after each cutting or sanding operation. Don’t wait until the end of your session—immediate cleanup prevents dust from becoming airborne and spreading. A compact shop vac costs $50-100 and is essential for apartment woodworking setup.
Sand Outdoors When Possible
Take sanding operations to a balcony, patio, or outdoor area when weather permits. This eliminates indoor dust entirely and is one of the best practices for apartment woodworking setup.
Attach Vacuum to Tools
Many drills and sanders accept vacuum hose attachments for dust collection at the source. This captures 70-90% of dust before it becomes airborne.
Seal the Workspace
If working in a dedicated room, close doors and use plastic sheeting to prevent dust migration. This is especially important during sanding operations.
Clean As You Go
Don’t let sawdust accumulate. Quick cleanups between operations prevent dust buildup and make final cleanup much faster.
Use Dust Masks
Always wear a dust mask rated N95 or better when sanding or cutting. Fine wood dust is a respiratory hazard regardless of wood species.
Air Filtration
Consider a small air purifier with HEPA filter running during and after work sessions. This captures airborne particles that escape other collection methods.
Storage Solutions for Apartment Woodworking Setup
Smart storage is essential for maintaining an organized, functional apartment woodworking setup in limited space.
Space-maximizing storage strategies:
Wall-Mounted Pegboards
Infinitely customizable and allow you to see all tools at once. Install above your work surface or on any available wall space. Pegboards are the backbone of efficient apartment woodworking setup storage.
Heavy-Duty Wall Hooks
Mount to wall studs to hold clamps, saws, and other hanging tools. Distribute weight properly to prevent damage. Use multiple hooks to spread load across several studs.
Stackable Clear Bins
Organize small parts, hardware, and consumables in labeled clear bins. Stack on shelves or in closets to maximize vertical space. Being able to see contents without opening saves time.
Portable Toolboxes
Keep frequently-used tools together in portable toolboxes that can be stored in closets when not in use. Choose models with multiple compartments and comfortable handles.
Under-Table Storage
Install shelves beneath your work surface for storing tools and materials. This maximizes use of otherwise wasted space in your apartment woodworking setup.
Magnetic Tool Strips
Mount on walls to hold chisels, screwdrivers, and small metal tools. Keeps sharp tools safely stored and immediately visible.
Rolling Tool Carts
Mobile carts bring tools to your work surface, then roll into closets or corners for storage. This flexibility is perfect for apartment woodworking setup configurations.
Vertical Lumber Storage
Wall-mounted brackets or simple racks store boards upright, saving floor space and preventing warping. Essential for any apartment woodworking setup that handles dimensional lumber.
Optimal Apartment Woodworking Setup Layout
Strategic layout maximizes efficiency in limited space:
| Area | Purpose | Storage Method |
|---|---|---|
|
Primary Wall
|
Tool storage
|
Pegboard, hooks, magnetic strips
|
|
Center Space
|
Work surface
|
Folding table or portable bench
|
|
Corner Area
|
Material storage
|
Vertical lumber rack
|
|
Upper Shelves
|
Supplies
|
Stackable bins for hardware, finishes
|
|
Under-Table
|
Frequently-used tools
|
Drawers or open shelving
|
This layout keeps everything accessible while minimizing clutter in your apartment woodworking setup. The work surface occupies the center position with tools stored on walls within arm’s reach. Materials are stored vertically in corners, and supplies live on shelves above or beside the work area.
Layout optimization principles:
- Maintain 2-3 feet of clearance around your work surface for safe movement
- Position frequently-used tools closest to the work surface
- Store rarely-used items higher or in less accessible locations
- Keep clear pathways to doors and windows
- Ensure adequate lighting from multiple angles
- Allow space for project assembly and finishing
Common Apartment Woodworking Setup Mistakes
Avoid these errors to maximize your apartment woodworking setup effectiveness:
Critical mistakes to avoid:
- Using loud tools without consideration — Power saws and sanders create noise complaints that can end your woodworking
- Random tool storage — Without designated homes, tools create clutter and waste valuable time
- Oversized furniture — Large workbenches and cabinets waste precious floor space in apartment woodworking setup
- Ignoring dust cleanup — Accumulated sawdust spreads throughout your apartment and creates health hazards
- Poor lighting — Inadequate lighting causes mistakes, eye strain, and makes the space uninviting
- Skipping floor protection — Dropped tools and spills can damage apartment flooring and cost you your security deposit
- Not communicating with neighbors — Surprising neighbors with noise creates conflict and complaints
- Buying tools before planning — Purchasing equipment before measuring your space leads to poor fit and wasted money
- Neglecting ventilation — Poor air circulation during finishing work creates fumes and health issues
Most apartment woodworking setup challenges are organizational and planning problems, not space limitations. Better preparation and tool selection solve the majority of issues beginners encounter.
Pro Tips for Successful Apartment Woodworking Setup
Follow these expert strategies for optimal apartment woodworking setup:
- Maintain strict organization — Spend 5 minutes after each session returning tools to designated spots
- Clean immediately — Don’t let sawdust accumulate between sessions
- Store lumber vertically — Saves floor space and prevents warping
- Use portable equipment — Choose tools and furniture that move or store easily
- Plan projects thoroughly — Think through each step before starting to minimize noise duration
- Work in batches — Complete all cutting at once, then all sanding, then assembly
- Invest in quality hand tools — Since hand tools are primary equipment, buy good ones
- Create mobile tool kit — Keep frequently-used tools in a portable caddy
- Document your setup — Take photos of your organization system to maintain it
- Join online communities — Learn from other apartment woodworkers’ experiences
FAQ About Apartment Woodworking Setup
Can woodworking be done safely in an apartment?
Yes, absolutely. A proper apartment woodworking setup with appropriate tools, good organization, and dust control is completely safe. Hand tools are inherently safer than power tools and work perfectly for indoor spaces.
What’s the best tool for apartment woodworking setup?
A cordless drill is the most useful power tool—compact, versatile, and relatively quiet. For hand tools, a quality handsaw is essential and should be your first purchase.
Do I need ventilation in my apartment woodworking setup?
Yes, basic airflow is recommended, especially when sanding or finishing. Open a window or door during work sessions to maintain air quality and prevent dust accumulation.
Is apartment woodworking setup beginner-friendly?
Very much so. Small indoor setups are actually ideal for learning fundamentals. The constraints force good habits like organization, planning, and proper technique that benefit all woodworkers.
Will my apartment woodworking setup disturb neighbors?
Not if you use primarily hand tools, work during reasonable hours, and communicate proactively. Most apartment woodworkers never receive noise complaints when following these guidelines.
What projects can I build with an apartment woodworking setup?
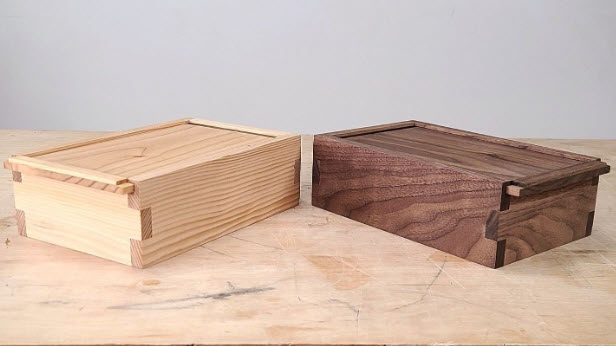
Most beginner and intermediate projects work well: cutting boards, small boxes, picture frames, shelves, small furniture pieces, decorative items, and gifts. Avoid projects requiring large sheet goods or extensive power tool use.
How much does an apartment woodworking setup cost?
A basic setup costs $200-400 including work surface, essential hand tools, storage, and safety equipment. This provides everything needed to complete dozens of projects.
Final Verdict on Apartment Woodworking Setup
An apartment woodworking setup is completely viable with proper planning, appropriate tools, and good organizational habits. A small, well-designed workspace with quiet tools can handle most beginner and intermediate projects safely and efficiently.
You don’t need a garage or large workshop to start woodworking—you just need a smart apartment woodworking setup and the willingness to begin. Thousands of woodworkers successfully operate in apartments by prioritizing hand tools, maintaining organization, and being considerate of neighbors.
The constraints of apartment woodworking setup often create better woodworkers. Limited space forces efficiency, noise concerns encourage hand tool mastery, and dust management builds good habits that serve you throughout your woodworking journey. Many apartment woodworkers discover they prefer their compact, organized setups even after gaining access to larger spaces.
Start with the space you have, implement these apartment woodworking setup strategies, and you’ll discover that indoor woodworking can be just as productive and enjoyable as working in a dedicated shop. Your apartment woodworking setup can grow and evolve with your skills, supporting your woodworking journey for years to come.
What To Read Next
Continue improving your apartment woodworking setup:
- Small woodworking shop ideas — Additional strategies for maximizing limited space
- Beginner tool list — Complete guide to essential tools for starting out
- Easy projects for beginners — Simple builds perfect for apartment workshops
- Hand tools vs power tools — Choosing the right tools for your situation
- Woodworking in small spaces — Advanced techniques for compact workshops
Each guide helps you build skills and confidence in your apartment woodworking setup journey.